Progressive Muscle Relaxation
A systematic tensing-and-releasing technique that targets every major muscle group. Fifteen minutes to physically teach your body the difference between tension and relaxation.
Developed by Edmund Jacobson in the 1930s, refined by Bernstein and Borkovec (1973). Multiple meta-analyses confirm effectiveness for anxiety, insomnia, and chronic pain. Manzoni et al. (2008) systematic review of 27 studies showed consistent anxiety reduction. Recommended by the American Psychological Association as a first-line relaxation technique.
Overview
Progressive Muscle Relaxation works on a simple principle: your muscles cannot be tense and relaxed at the same time. By deliberately tensing a muscle group for 5-7 seconds and then releasing, you create a contrast that teaches your nervous system what relaxation actually feels like. Most people carry tension in their shoulders, jaw, or lower back without realizing it. This practice makes that invisible tension visible, then eliminates it.
Steps
1. Setup and Baseline Check
Duration: 60 seconds
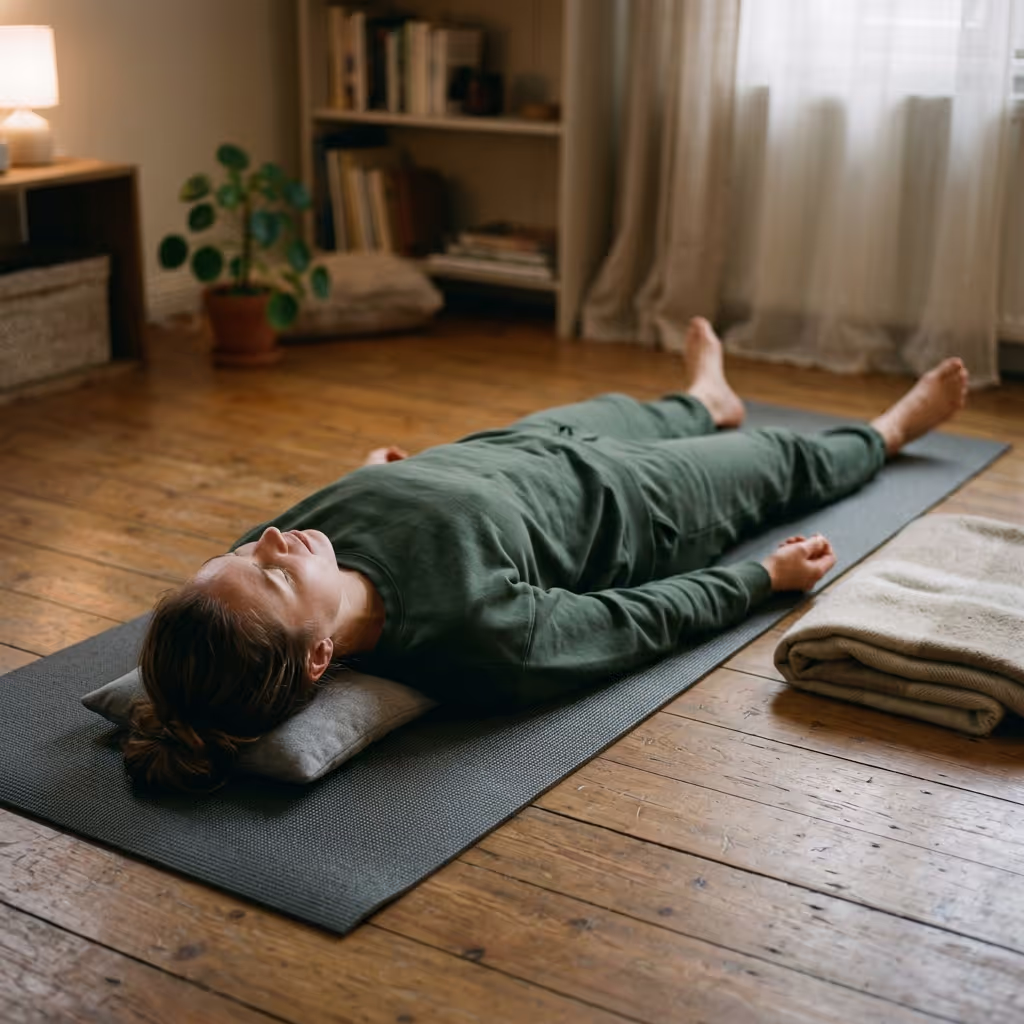
Lie on your back with legs extended and arms at your sides, palms up. If lying down isn't possible, sit in a chair with both feet on the floor. Close your eyes. Take three slow breaths. Now do a quick mental scan from head to feet. Where do you notice tension right now? Don't try to fix it yet. Just notice. This is your baseline.
2. Feet and Lower Legs
Duration: 90 seconds
Curl your toes tightly, as if gripping the floor with them. Hold for 5 seconds. Feel the tension spread through the arches of your feet and into your calves. Now release. Let your feet go completely limp. Notice the contrast. Your feet might tingle slightly. That's blood flow returning. Breathe into that feeling for 10-15 seconds before moving on.
3. Upper Legs and Glutes
Duration: 90 seconds
Press your thighs together and squeeze your glutes. Your legs should feel like solid columns. Hold for 5 seconds. You'll notice your lower back might arch slightly — that's how connected these muscles are. Release everything at once. Let your legs fall open naturally. Feel your hips drop into the floor. Your lower back will settle. Stay here for 10-15 seconds.
4. Abdomen and Lower Back
Duration: 90 seconds
Pull your belly button toward your spine, tightening your abdominals as if bracing for impact. Hold for 5 seconds. You'll probably notice you stopped breathing. That's common — these muscles are directly connected to your diaphragm. Now release. Let your belly soften completely. Take two deep breaths and feel your abdomen rise and fall freely. This is what unguarded breathing feels like.
5. Chest, Shoulders, and Upper Back
Duration: 120 seconds
Take a deep breath and hold it while pulling your shoulders up toward your ears and squeezing your shoulder blades together. This creates tension across your entire upper body. Hold for 5 seconds. Now exhale and drop everything. Your shoulders may fall further than you expected — that's the tension you were carrying. Let your arms go heavy. If you're lying down, feel the full surface area of your back pressing into the floor. Rest here for 15 seconds.
6. Hands and Arms
Duration: 90 seconds
Make tight fists with both hands. Squeeze hard. Now bend your arms and flex your biceps like you're showing off. Hold both — fists and biceps — for 5 seconds. Release. Open your hands wide, then let them go limp. Let your arms drop to your sides. You might notice tingling in your fingertips. Your hands may feel warm. That's normal — the blood vessels in your hands dilate when tension releases.
7. Face and Jaw
Duration: 120 seconds
This is where most people hold far more tension than they realize. Scrunch up your entire face: squeeze your eyes shut, wrinkle your nose, clench your jaw, press your lips together. Hold for 5 seconds. You might look ridiculous. That's fine. Now release everything. Let your jaw drop slightly open. Let your tongue fall away from the roof of your mouth. Smooth your forehead. Soften around your eyes. Most people don't realize they clench their jaw all day. Notice what a fully relaxed face feels like.
8. Full Body Integration
Duration: 120 seconds
Take a deep breath. On the exhale, mentally scan from your feet to your head. Everything should feel heavier, warmer, more settled than when you started. If any area still holds tension, tense just that area once more, then release. Take three more slow breaths. When you're ready, wiggle your fingers and toes. Roll your head side to side. Open your eyes slowly. Sit up gradually if lying down. Notice: this is what your body feels like without unnecessary tension.
Why practice this
Benefits
- Reduces muscle tension and chronic pain (Bernstein & Borkovec, 1973)
- Lowers cortisol levels by 15-20% after a single session
- Decreases insomnia severity — 60% of participants improved sleep onset in clinical trials
- Reduces anxiety symptoms comparable to some medications (Manzoni et al., 2008)
- Lowers resting blood pressure with regular practice
- Helps identify where you carry stress before it becomes pain
Research
Developed by Edmund Jacobson in the 1930s, refined by Bernstein and Borkovec (1973). Multiple meta-analyses confirm effectiveness for anxiety, insomnia, and chronic pain. Manzoni et al. (2008) systematic review of 27 studies showed consistent anxiety reduction. Recommended by the American Psychological Association as a first-line relaxation technique.
Science
When you tense a muscle group and release, you activate the Golgi tendon organ reflex — a safety mechanism that forces muscles to relax after sustained contraction. This creates deeper relaxation than simply trying to relax. Simultaneously, the practice shifts your autonomic nervous system from sympathetic (fight-or-flight) to parasympathetic (rest-and-digest) dominance. Manzoni et al. (2008) found this shift reduces cortisol, lowers blood pressure, and decreases heart rate within a single session.
Preparation
What You Need
- A quiet space where you can lie down or sit comfortably
- 15 minutes without interruption
- Loose, comfortable clothing
- Optional: yoga mat, blanket, pillow under knees
Pro tips
Tips for Success
- 1Tense at about 70% effort, never to the point of pain or cramping
- 2If you have an injury in a specific area, skip that muscle group entirely
- 3Practice at the same time every day — your body learns to anticipate relaxation
- 4Pair with slow breathing (inhale during tension, exhale during release) for stronger effect
- 5After 2 weeks of daily practice, try the release-only version — just relaxing each area without tensing first
Ready to Start?
Take 15 minutes today. Follow the steps above and begin building your practice.
Explore More Practices